Wednesday, October 6, 2010
Yamaha is air TIGHT!!!

Couple things happened: I brought the boat to my place in city and I pressure tested the Yamaha sled engine - it passed!!!
The pressure test surprised me with good result! I was prepared for the worst scenario and brought tools to remove the engine from the sled. I blocked the exhaust with rubber sheet


and plugged the inlet with tester adapter,

pressurized to 8 psi: lost the pressure in a minute!!! Sprayed the engine with soapy water - no bubbles, but I could hear the air escaping somewhere... It was a pulse line for fuel pump! Blocked that and pressurized engine again to 8 psi.
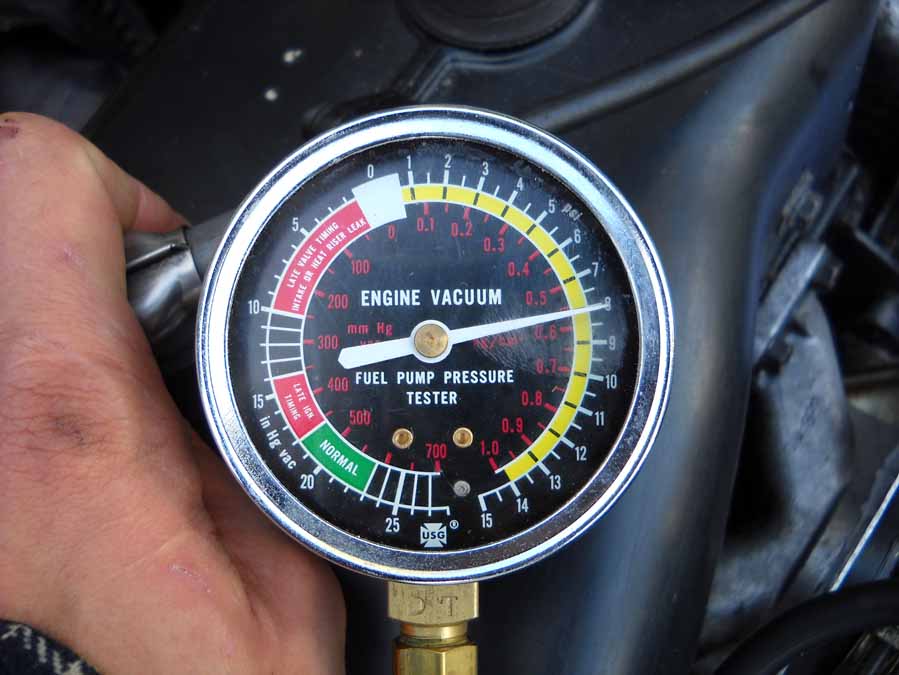

Waited a couple minutes - still 8... Left it for 10 minutes - 8 psi... Great! Put everything back together - will test-drive the sled when we get the snow.
Now I think, that I could make the test a bit more complicated by cranking the engine a couple times before it, but I think it wouldn't make a big difference: if I will have a leak at seals, I would find that anyway...
Read more...

Sunday, October 3, 2010
Leak down tester for two-strokes

For those who are interested here is a bit more information on the tester >>>>
What is pressure testing? The pressure testing of a 2-stroke engine is a test performed to verify air leakage (actually, you don’t want air leakage). An air leaks will cause lean conditions in air/fuel mix with a possible result in engine damage (seizure, detonation, hole in the piston, etc.)
For more information how to perform the test and how to build the tester you can check these links:
www.duncanracing.
www.macdizzy.comh
www.greenhulk.net
www.allthingsmoto.com
Last week I received the pressure/vacuum gauge in the mail and today I put the tester together. At first I wanted to use the valve from tire tubes, so I can use bicycle hand pump, but I couldn’t find it in my bits bin… I decided to use the leak down tester set up I have for 4-stroke engines. It has regulator, so I can increase the pressure safely. I don’t have a vacuum pump, so I will do only pressure testing for now…
The gauge I use is common engine vacuum/pressure tester available from some auto parts stores.

I got mine from ebay for 16 dollars shipped. It comes with a hose, so all you need are fittings, brass T, some kind of check valve or just a shut off valve like I used and source of pressure/vacuum. Actually, you can use whatever you have: the gauge is suppose to be able show you low pressure precisely enough.


I am going to test my Yamaha Excel engine, so I use taper rubber plug with maximum OD 1.8” – it fits right in rubber intake manifold. I am going to seal the exhaust with rubber sheet.
I am curious to see the result…
Read more...
Friday, October 1, 2010
Busy week
Still working on the Elan's frame. Still need to upload some pictures... Will do!
Wednesday and Thursday I spent at the cottage working on the Yamaha sled and boat trailer. Yamaha is almost done for the winter season. Almost - because I need to pressure test the crankcase. Last season I had problems with lean mixture and I couldn't find any obvious reason for that. I got the low pressure/vacuum gauge, so I am going to test the engine next week.
Another thing I am going to do next week is moving my boat from cottage to city. I got some space on the driveway where I can park it and it's much easier to work near the home - much more productive. I changed the wheel bearings yesterday and installed new trailer lights, so it's safe on the road. The longest trip I made with that trailer was to the nearest marina which is in front of my cottage:) Now I can go as far as I want:) Trailer wheels still need to be cupped, but I am going to do next week. Also, towing vihecle (Toyota Corolla) has to get trailer lights converter because it has separate circut for turn lights. I was thinking about making the convertor myself but ended up buying it for $17 at Princess Auto. Not THAT cheap, but I can live with that:)
Read more...
Monday, June 28, 2010
Some more work done on the boat
Read more...
Saturday, June 19, 2010
Boat: subframe is glassed... Finally...


First day I was filling the voids and making nice radiused beams. I was using talc as the thickener for resin this time: was kinda disappointed. Compare to cabosil, it's terrible!!! (It's cheap, though: $40 for 50Lb) Hard to get the right ratio, problematic to make it smooth, really fragile... I had to ad in to mix some wood dust and chips - it helped a bit to hold mixture together. Anyway, I finished with that on Thursday, on Friday early in the morning I started glassing. With all fiberglass precut the process was really straight forward: mix new batch of resin, glass, mix again, etc... It was a bit too hot in the afternoon: boat warmed up and the resin working time shortened to 5 minutes! I just started to use smaller batches of resin.
Anyway, big job is done. Next time I will fix all the air bubbles and dry spots and install drainage pipes. After that I could move to the next step and start work with the floor.
Here are some pictures:


Read more...
Tuesday, June 1, 2010
I bottled the second beer brew yesterday as well. This time I added more priming sugar, because the previous batch wasn’t carbonated evenly: one bottle is good, two – flat… Let’s see what happen…
Also I need to get some resin filler for my boat project. Hopefully I will get chance to work on it this week – most likely on the weekend. I am thinking about buying some talc – that’s the cheapest option.
Now, I am back to house renovation… Need to make a trip to Home Depot…
Read more...
Thursday, May 20, 2010
Boat progress
Here is the picture of 1708 - fiberglass material I use for reinforsing stringers and bulkheads. I will use one layer of it on bulkheads and two layers on stringers.

Here is my working area: all fiberglass cut to size, wood is ready for fireplace:)
I used all the resin filler... Had to use some wood "dust" - not the best filler, but worked as temporary (read permanent) replacement. Need to buy some talc now...
Some pictures of fiberglassed subframe:


Some extra glass here to reinforce the transom:

Some more pictures:


I have a little problem here: thick fiberglass doesn't like corners and points... I needed to cup the plywood with something on the top. I rounded all the edges, thinking that I can wrap the glass around - that was a mistake. Fiberglass doesn't want to stay on the radius... Decided just to cover it with resin for now. On the rest of the subframe I will try to keep tops as flat as possible...
Here are the pictures of the glassed tops...


This one is just covered with resin. I am thinking about thickening the resin with some fibers before applying. Should stay in place better:

Here is the picture of the nose part: same work has to be done... I started from sanding and vacuuming... Hate that part...
Read more...
Sunday, May 16, 2010
Week plan.
Worked on the Elan frame: removed some paint, etc.
Bought some suppluies for boat project: 5 gal. of resin, 8 kg. of 1708 8" fiberglass tape, etc.
Tomorrow going to the cottage to get some work done: will laminate the stringers and bulkheads to the hull.
Also, started another batch of beer today. Stout again. Bottling in two weeks.
Read more...
Monday, May 10, 2010
Back to the boat
Today's mantra is "sanding"... Spent four hours sanding the subframe. Vacuumed everything, checked the result and finished missed areas.
After sanding was done...

Raccoon got the grinder!!!

My feet are sore, hands are shaky...
Also, I tried the new for me way to fill the gaps: dispersing compound with a plastic bag. Like the cooks use on the cakes to spread the cream... Worked perfect! All you need to do after - just smooth the bead with a finger:)
Here are some pictures of the beads:

Another angle:

One more shot:

One more:

And the last one...

Next time I will start fiberglassing the subframe to the hull.
Read more...